Showing posts with label everyday. Show all posts

8.13.2012

Attack of the Garden Tomatoes (with recipe for Slow-Roasted Tomatoes)


Whether or not you have a dirty mind, you need to take a look at this weird thing that came out of our garden. Yikes!


We have so many tomatoes, we don't know what to do with them all. The other day, we harvested a few and put them in a bowl on the kitchen windowsill where Louie (our younger cat) loves to lie down in the sunshine. The next morning, this is what we found. Guess Louie likes tomatoes! And, yes, we found a different location to store them in.


Sun Sugars

Husky Red Cherry Tomatoes


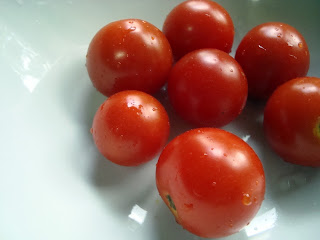
We are totally into these Sun Sugars - perfect, round, bright orange tomatoes that taste like candy! Great for straight up eating, but we have soooo many. We also love the Husky Red Cherry tomatoes that are just now ripening.


Rather than buying "sun-dried" tomatoes in a jar (Are they really dried in the sun, or is it some sort of chemically induced drying process?), we are making slow-roasted cherry tomatoes that will allow us to take our tomatoes into fall! We will use them in pasta dishes, salads, bruschetta, so many uses! Here's what we do, but this is definitely one of those "flexipes" (that would be a flexible recipe): use the herbs you like, don't use garlic if you don't want to, adjust the amounts according to the number of tomatoes you have. You get the picture.


What's great about these is the intense flavor that is brought out during the roasting. We ate most of them shortly after they cooled. Some we stored in olive oil - the added flavor that is infused into the oil is fabulous for bread-dipping and such. People tend to be wary of storing things in olive oil, but as long as your ingredients are well-washed, your storage container is sterilized, and you store these in the refrigerator, all research we've done says it's fine to keep tomatoes like this for up to six weeks. Longer than that, and you should follow stricter canning/preserving techniques. They taste so good, you won't need to worry about all that...


Slow-Roasted Tomatoes
Ingredients:

4 cups cherry or grape tomatoes, halved
2 tablespoons fresh rosemary, chopped*
2 tablespoons olive oil
kosher salt
freshly ground black pepper
parchment paper
6 cloves garlic, unpeeled
1/4 to 1/2 cup olive oil for storage

sterilized canning jars with airtight lids

*Cooks' note: We used rosemary this time and are thinking of using oregano, thyme, or basil for future roastings. Yes we will soon have that many tomatoes.


Preheat oven to 200 F. In a large bowl, place the halved tomatoes and rosemary. Drizzle with olive oil and season with salt and pepper to taste. Gently mix well with your hands. Line baking sheets with parchment paper. Pour tomatoes onto parchment paper in one layer, then place garlic cloves in different areas on the baking sheet. Bake for 2-3 hours, until tomatoes look mostly dry. Allow them to cool well. If storing, place them in canning jars, packing them in well and using the handle of a wooden spoon to force air out of the jar. Cover completely with olive oil and seal with airtight lid. Store in refrigerator for up to six weeks.


8.07.2012

Plum Crazy Cornish Game Hens


If you can believe it, we haven't yet told you about all of our New Orleans food adventures. But we'll come back to it. Now that we are home, we've been cooking again and the idea for this recipe was a bunch of beautiful red plums Chris brought home from the market. He had gone out to get produce and when he got home, he laid it all out on the table. It was a hodge-podge of fruits and vegetables, and for some reason, I honed right in on the plums and the red peppers. Weird mix, eh? That's why we're calling this recipe "Plum Crazy Cornish Game Hens."


It was definitely an experiment, roasting the plums, peppers, and some onions right in with the hens in a cast iron pan. We prefer to cook with red bell peppers over green; green peppers seem to take over everything else in a dish with their strong flavor. Anyway, the plums and peppers mixed in with the pan juices to create a side dish that was sweet and sour, soft and crunchy, all at the same time. We weren't really sure how these flavors were going to be together, but we loved it with the game hens. Crazy!


Plum Crazy Cornish Game Hens


Ingredients:


2 Cornish game hens
kosher salt and freshly ground black pepper to taste
2 tablespoons olive oil
4 red plums, chopped
1/2 onion, chopped
1 red bell pepper, chopped
1 tablespoon honey


Heat a cast iron pan at 450 degrees for 45 minutes. Splay the game hens and season them, inside and out, with salt and pepper. Carefully add them to the heated pan, breast side up. Drizzle the hens with olive oil and cover the pan with foil. Roast for 30 minutes. Toss the chopped plums, pepper, onion and honey in a large bowl. Season with salt and pepper. Add this mixture to the pan with the hens and stir to coat with the pan juices. Roast for 15 minutes uncovered, or until hens are cooked through. If hens are not brown enough, place pan under broiler for 5 minutes. Remove hens from pan and allow them to rest. In the meantime, over medium-high heat, reduce the plum and pepper mixture to desired consistency. Serve alongside roasted hens.

7.27.2012

Summer Corn and Cockles Pasta


No, we have not forgotten our promise to tell you more about our culinary adventures in New Orleans. We ate and drank our way through the city, took plenty of photos, spent time with wonderful friends, and now that we're home safe and sound, we need some time to organize our thoughts (and those photos!). So we will come back to that.


But having indulged in Southern style cuisine for all that time, for last night's dinner we wanted something lighter than what we've been eating. Chris went out to buy some produce and along with it, a pound of teeny tiny heart-shaped cockles that he thought would be great in a summery pasta dish. We used a garlic-parsley angel hair we bought at the farmers market a few weeks ago and made a tangy sweet sauce with Sicilian lemon vinegar.  Garlic added a much-needed kick and lemon zest boosted the fresh, light flavor. We liked it a lot, but might try it with some red pepper flakes next time. Can't find lemon vinegar? Use white wine vinegar and add a bit of lemon juice. Plain angel hair will work nicely as well.


Summer Corn and Cockles Pasta
(makes a light dinner for two or
four appetizer-sized plates)

Ingredients:


2 nests garlic-parsley angel hair pasta
1 tablespoon olive oil
1 clove garlic, chopped
1 pound cockles in the shell
1 ear of fresh corn, kernels shaved off
1 teaspoon lemon vinegar
1 teaspoon simple syrup
1/4 teaspoon lemon zest
1 tablespoon chopped fresh cilantro


Prepare the angel hair according to package directions. While pasta is cooking, heat olive oil in a large skillet over medium-high heat. Add garlic and cockles and cook, shaking the pan often, until cockles begin to open. Add the corn kernels and vinegar and continue to shake the skillet to incorporate. Gently stir in the simple syrup and lemon zest and give it a couple of last shakes, cooking until all cockles are open. Set aside. Drain pasta and toss in cockles and sauce. Serve garnished with chopped cilantro.

6.25.2012

"Semi-Homemade" Cherry Crostata

This week, we officially reinstated our weekly summer dinner with neighbors D and J (and 3-year-old N). When we're in town, we pick a night, split up the dinner duties and share a meal, as good neighbors should. We talk and laugh and drink wine and generally just enjoy each other's company while the sun goes down (or in today's case, the thunderstorm ends).

This week's menu revolved around one of D's Father's Day gifts: Jack Daniels Wood Smoking Chips. Since D and J work during the day while we teachers are home (tee hee), D entrusted us with the chips so we could smoke country-style pork ribs in our smoker. Chris rubbed the ribs with his secret blend of sugar, salt and spices and smoked them for a few hours while making a Jack Daniel's barbecue sauce. Amy made a quick cucumber salad, and together we did a "semi-homemade" cherry crostata for dessert. Some grilled corn and mashed potatoes rounded out the meal. Sounds good, eh?


Everything was delicious - the smoky-sweet tender ribs, the early butter-sugar corn, the buttery mashed potatoes with fresh chives, the vinegary cucumber salad.  We would love to say the dessert stole the show, but that was not the case. Still, it too was delicious. Tart, sweet, and with plenty of buttery crust, it was a fitting ending. Perhaps it was the beautiful fresh cherries that did it? Maybe it was the easy preparation and simple rusticity of the crostata. You can come to your own conclusions if you make it yourself. And if you do, make sure to follow this great tip from Chris:

Use a chopstick to pit the cherries. The pits pop right out, and then you can cut the cherries in half easily.


"Semi-Homemade" Cherry Crostata
slightly adapted from Michael Chiarello's Napa Style

Ingredients:

1 refrigerated pie crust
1 pound fresh cherries, pitted (see tip above)
1/4 cup sugar
1 tablespoon all-purpose flour
1/4 teaspoon cinnamon
1 egg
1 tablespoon heavy cream
2 teaspoons turbinado sugar

Place a pizza stone in the oven and preheat it to 425 degrees. Line a baking sheet with parchment paper. Unroll one refrigerated pie crust onto the parchment paper. In the meantime, cut the cherries in half and place them in a large bowl. Add sugar, flour and cinnamon to the cherries and toss gently until well combined. Pour the cherry mixture into the center of the pie crust. Fold the sides of the pie crust up over the edge of the cherries. Beat together the egg and cream and brush this mixture onto the pie crust. Sprinkle with turbinado sugar. Trim away the extra parchment paper and carefully slide the crostata, with parchment paper under it, onto the hot pizza stone. Bake at 425 for 30 minutes, until crust is golden brown and cherry mixture is starting to bubble. Cool on a wire rack until ready to serve.  

5.21.2012

Apple, Raisin and Celery Seed Slaw (Secret Recipe Club)


It's "That Time of Year." We're both teachers in "real" life, so it's cram time  - finishing up curriculum, grading papers, writing and giving exams - not to mention chaperoning and/or attending proms, field trips, end-of-year ceremonies, SATs and graduations after school and on weekends. Add to that all the family stuff, like First Communions, baby showers, birthday parties, and barbecues, graduation parties, etc., and our social calendar is filled to the brim. We haven't been giving the blog enough of our attention already, and then bam! Suddenly we realize it's Secret Recipe Club time!


Thank goodness for the wide variety of recipes on our assigned blog for this month, Feast on the Cheap. Feast on the Cheap is a mother-daughter collaboration that offers readers plenty of recipes to choose from, with prices per serving included, figuring in the cost of each ingredient and based on a "well-stocked" pantry (for which they offer suggestions). Their pictures are gorgeous, and their Recipe Index is an excellent source for ideas. We've bookmarked this one, and so should you!


We would have had a very difficult time choosing a recipe, except for the fact that this particular recipe had to suit a purpose. It had to be something that would feed a crowd and would be kid-pleasing, for we were going to take it to the birthday party D and J were throwing for their 3-year-old daughter. And, unfortunately, they had plenty of desserts, so we couldn't go that route.


Which brings us to our choice: Apple, Raisin, and Celery Seed Slaw, which costs a mere $0.85 cents per serving, went well with burgers, and pleased both kids and adults alike. At once both sweet and savory, slightly tart and delightfully crunchy, this slaw was a hit. We followed the recipe exactly, so we'll save the typing and direct you to go HERE, where you can also see a photo of the finished product, which (in our chaotic mindset) we neglected to take. Oops!!!


Secret Recipe Club  

5.08.2012

Cast-Iron Roasted Chicken (including how to care for cast-iron)

How could we possibly resist a recipe for roast chicken that promises "crunchy, shiny, mahogany skin?" Frankly, we couldn't. Once we read Melissa Clark's article and recipe (found here), we were off to the store to get a small bird for two. And we may never roast a chicken any other way again.


We love to cook over high heat,  and our cast-iron pans are some of our most used kitchen items. We have them in all sizes, thanks to a mom (Amy's) who loves tag sales and bargains. Chris has become an expert at seasoning them, and maintaining that smooth, non-stick, surface that cast-iron is known for.


"Seasoning" is probably the scariest thing about cast-iron, but it shouldn't be. Today's cast-iron pans come pre-seasoned, but some care must be taken in cleaning them. The important thing to remember is to clean your cast-iron with a "paste" of hot water and kosher salt that clears away stuck-on foods. Never use soap or steel wool. Dry the pan right away to avoid rusting. If foods start to stick to the pan more and more often, it needs to be re-seasoned. To do this, apply a tablespoon of oil (vegetable or olive) or lard onto it with a paper towel then bake it at 350 for an hour or so. That's all there is to it!

Organic Spring Garlic from Urban Oaks Farm


Spring Garlic (trimmed)

Sliced Shallots


Capers packed in salt

Now bake to the amazing recipe. We followed Melissa's recipe, although we changed our ingredients to include spring garlic (instead of ramps) and salted capers instead regular capers. We also added sliced shallots (just because) and two red potatoes (diced) to round out our meal (we love our starches). Recipes are only suggestions, after all! Otherwise, we followed her directions very closely, (which (again) can be FOUND HERE), including salting and refrigerating the chicken for 2 hours ahead of time, preheating the skillet for 45 minutes in a very hot (500-degree) oven, and splaying the chicken.


Our ingredients, but add one lemon and some olive oil

The results were exactly as promised - the skin was shiny and crunchy and, if not mahogany, at least golden brown. And talk about evenly cooked! Every last bite was extremely tender and juicy, and the caramelized garlic/onion/potato mixture was full of flavor. One caveat - the oil in the pan splattered a bit in the (very) hot oven so we had a little bit of smoke. Nothing an open window or two won't solve! So even if you think you can't perfect your roasted chicken recipe, or that you don't need yet another one, please try this one. For us, at least, this recipe is The One. Thank you, Melissa Clark!

Golden brown chicken in a cast-iron pan, nearly done


Caramelized garlic, shallots and red potatoes